Trinsic Studio is the best and simplest tool for verifiable credential exchange. Through the Studio, developers can seamlessly manage their self-sovereign identity (SSI) integrations, all in one easy-to-use web application. Designed for simplicity and usability, Trinsic Studio has all the tools you need to build an SSI solution.
In this how-to post, we will be walking through how to issue credentials in Trinsic Studio. Follow the steps below, and you’ll be issuing credentials in minutes!
Sign up for a free Trinsic Studio account
To do so, go to https://trinsic.studio/ and follow the instructions on the screen.
Create an Organization
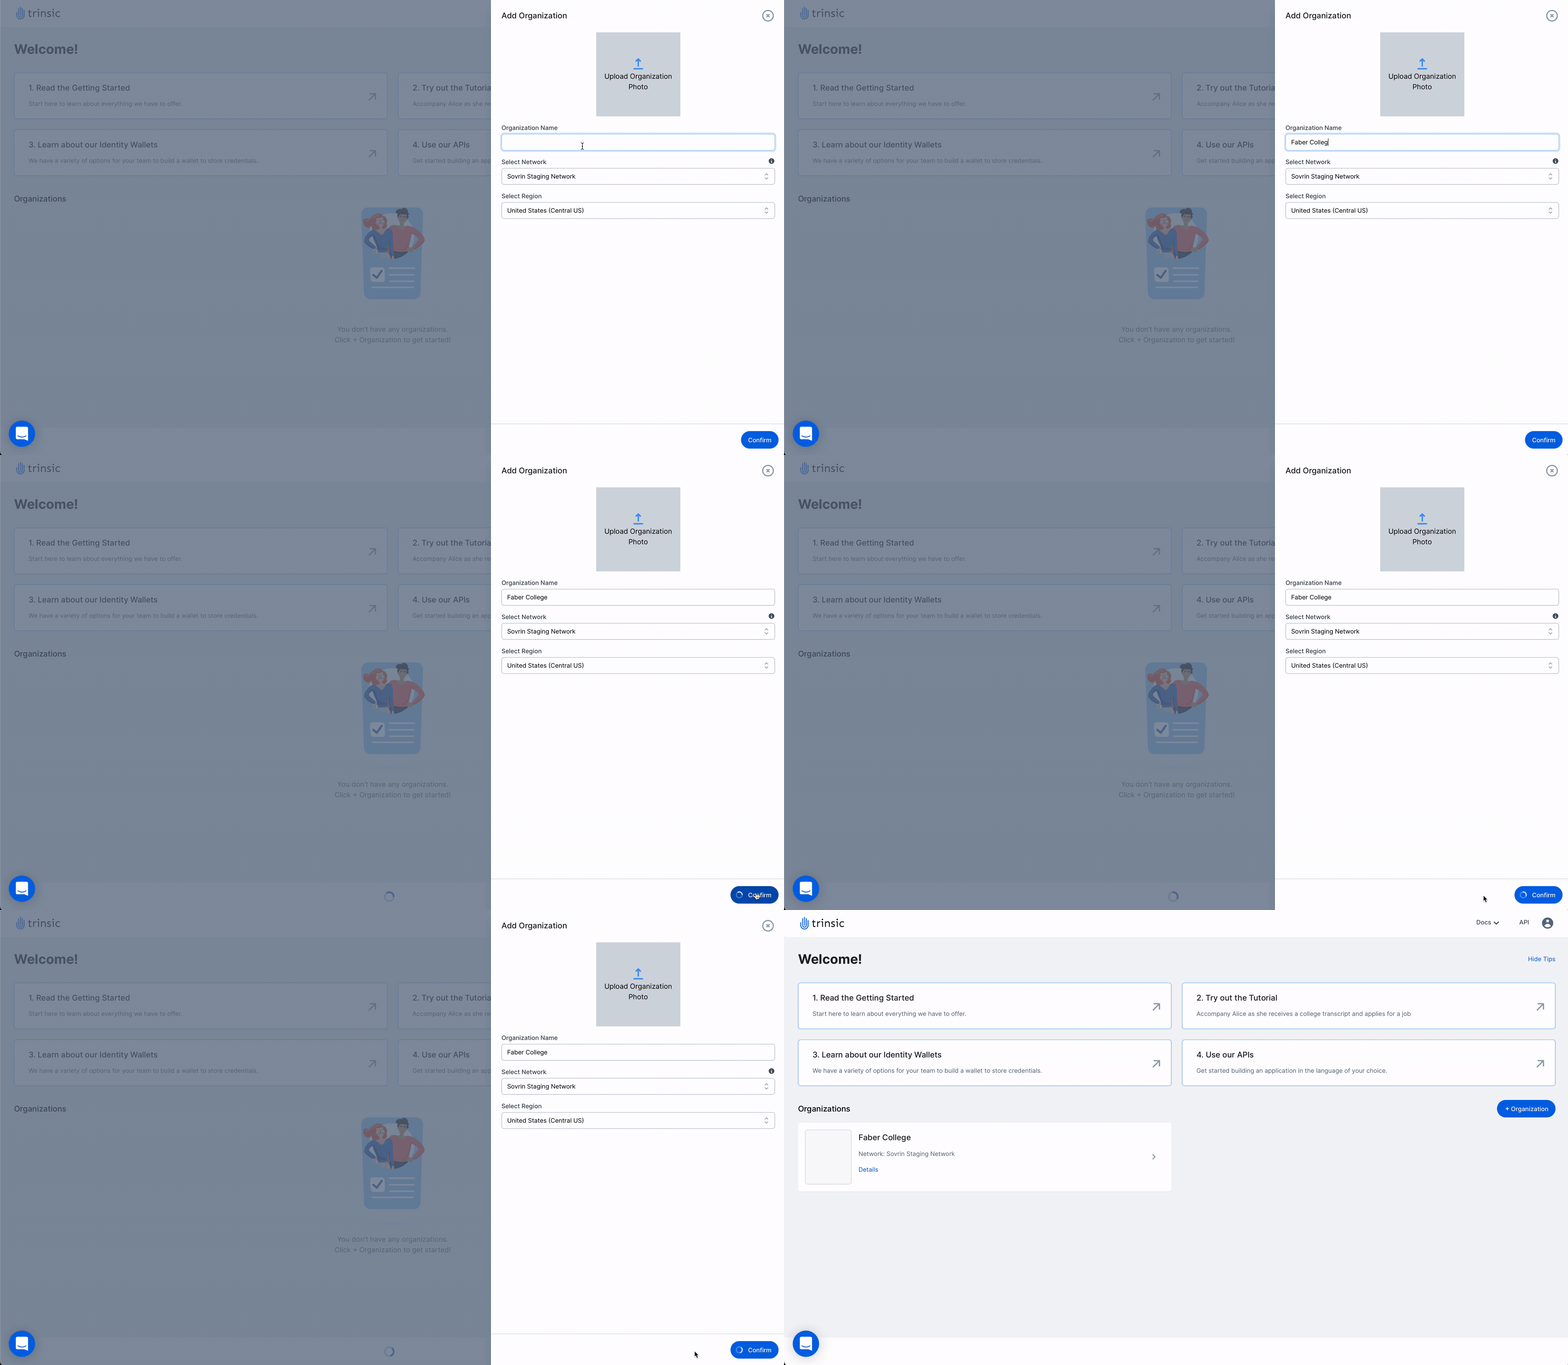
In order to issue a credential, you must first create the Organization that will be issuing the credential. For this example, let’s say that Faber College is issuing its most recent graduate class digital diplomas in the form of a verifiable credential. To make Faber College an Organization in Trinsic Studio:
- Click on the “+Organization” button on the dashboard screen.
- Create an Organization called Faber College. Feel free to upload a logo if you would like. For the Preferred Network drop-down, make sure you are on Sovrin Staging for this walkthrough. Click “Continue to Review”.
- After making sure all the information is correct, click “Confirm”.
And just like that, Faber College has been created as an Organization on Trinsic Studio.

Create a Credential Template
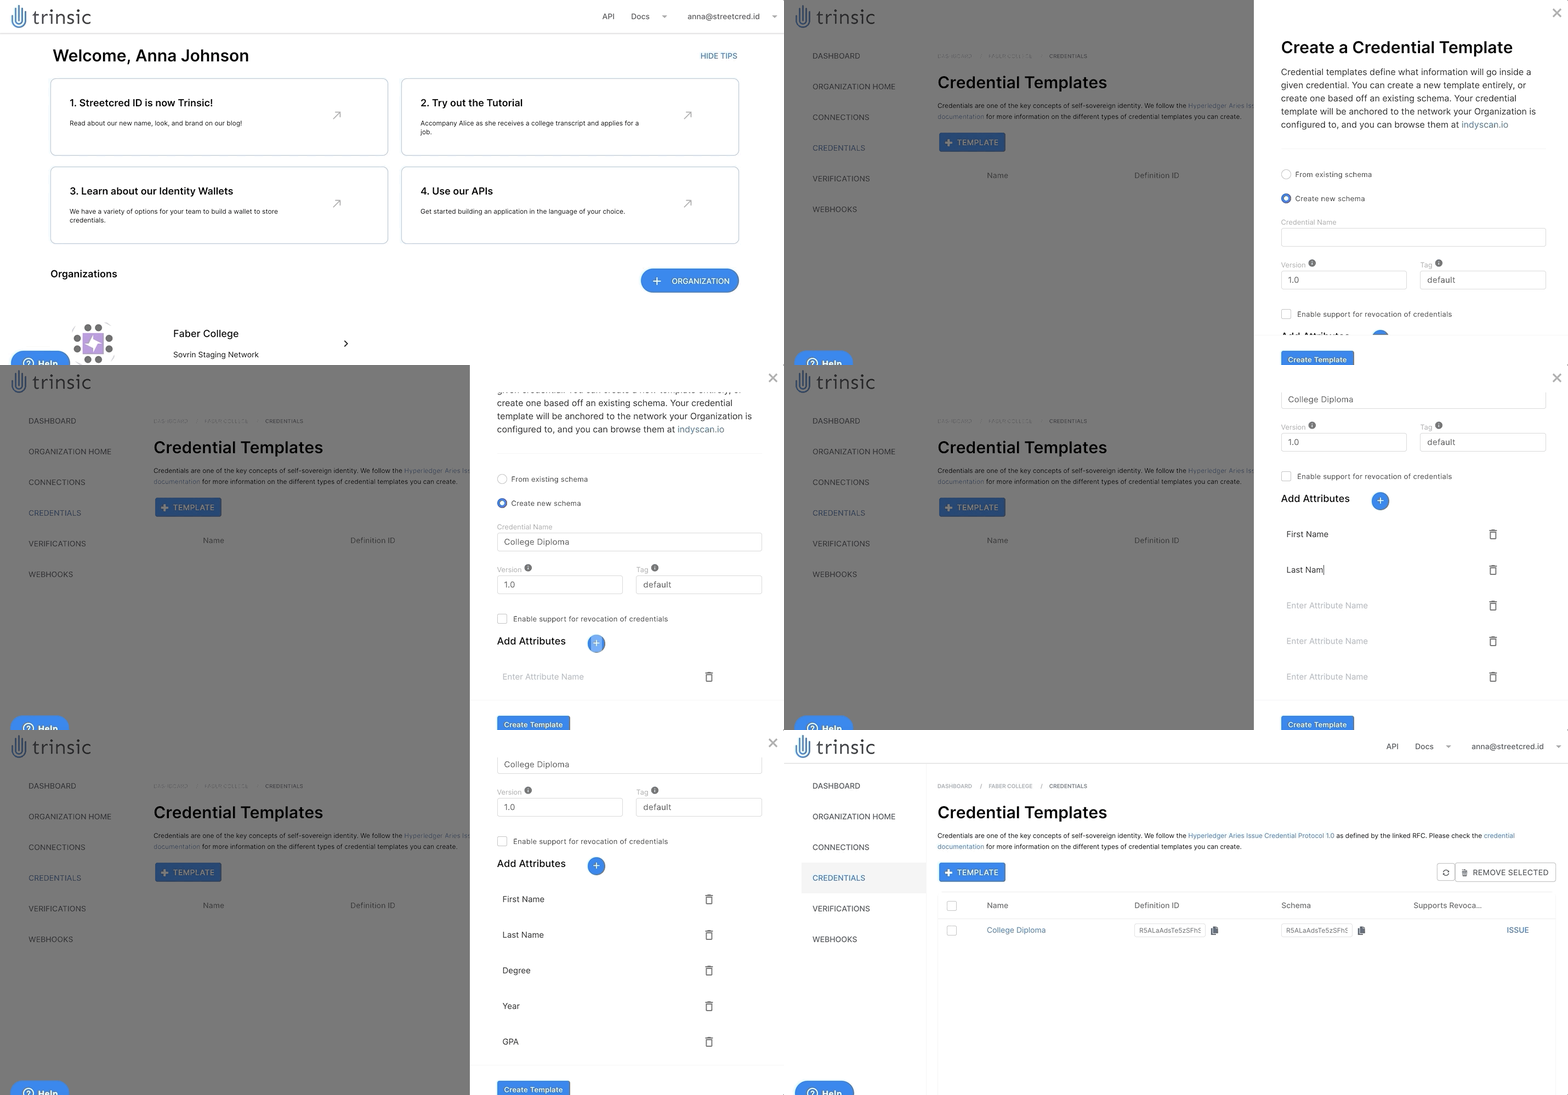
All verifiable credentials come from credential templates. These templates specify what information should be included in a credential. Faber College would most likely want the credential template of its digital diplomas to include a graduate’s first and last name, what they got their degree in, what year they graduated, and their GPA. Let’s begin!
- First, click on the Faber College organization card on the dashboard screen.
- Second, go to the Credentials tab and click the “+ Template” button.
- Third, fill out the “Create a Credential Template” form. Since we are creating a brand new credential template, choose the “create new schema” option. Name the credential “College Diploma”. Go ahead and leave the “Version” and “Tag” boxes as they are. You can read more about each if you hover over their icons. You can also make the credentials revocable if you would like, but we are not going to do that in this tutorial. Now, add the following five attributes: First Name, Last Name, Degree, Year, and GPA. Click “Create Template”.
With this credential template created, Faber College can start issuing credentials to its graduates.

Issue a credential
This is the fun part! The first graduate Faber College will send a digital diploma to is Alice Smith. To do so:
- Navigate to the “Credentials” tab as Faber College.
- Locate the “College Diploma” credential template.
- Click on the “ISSUE” button that corresponds with that template.
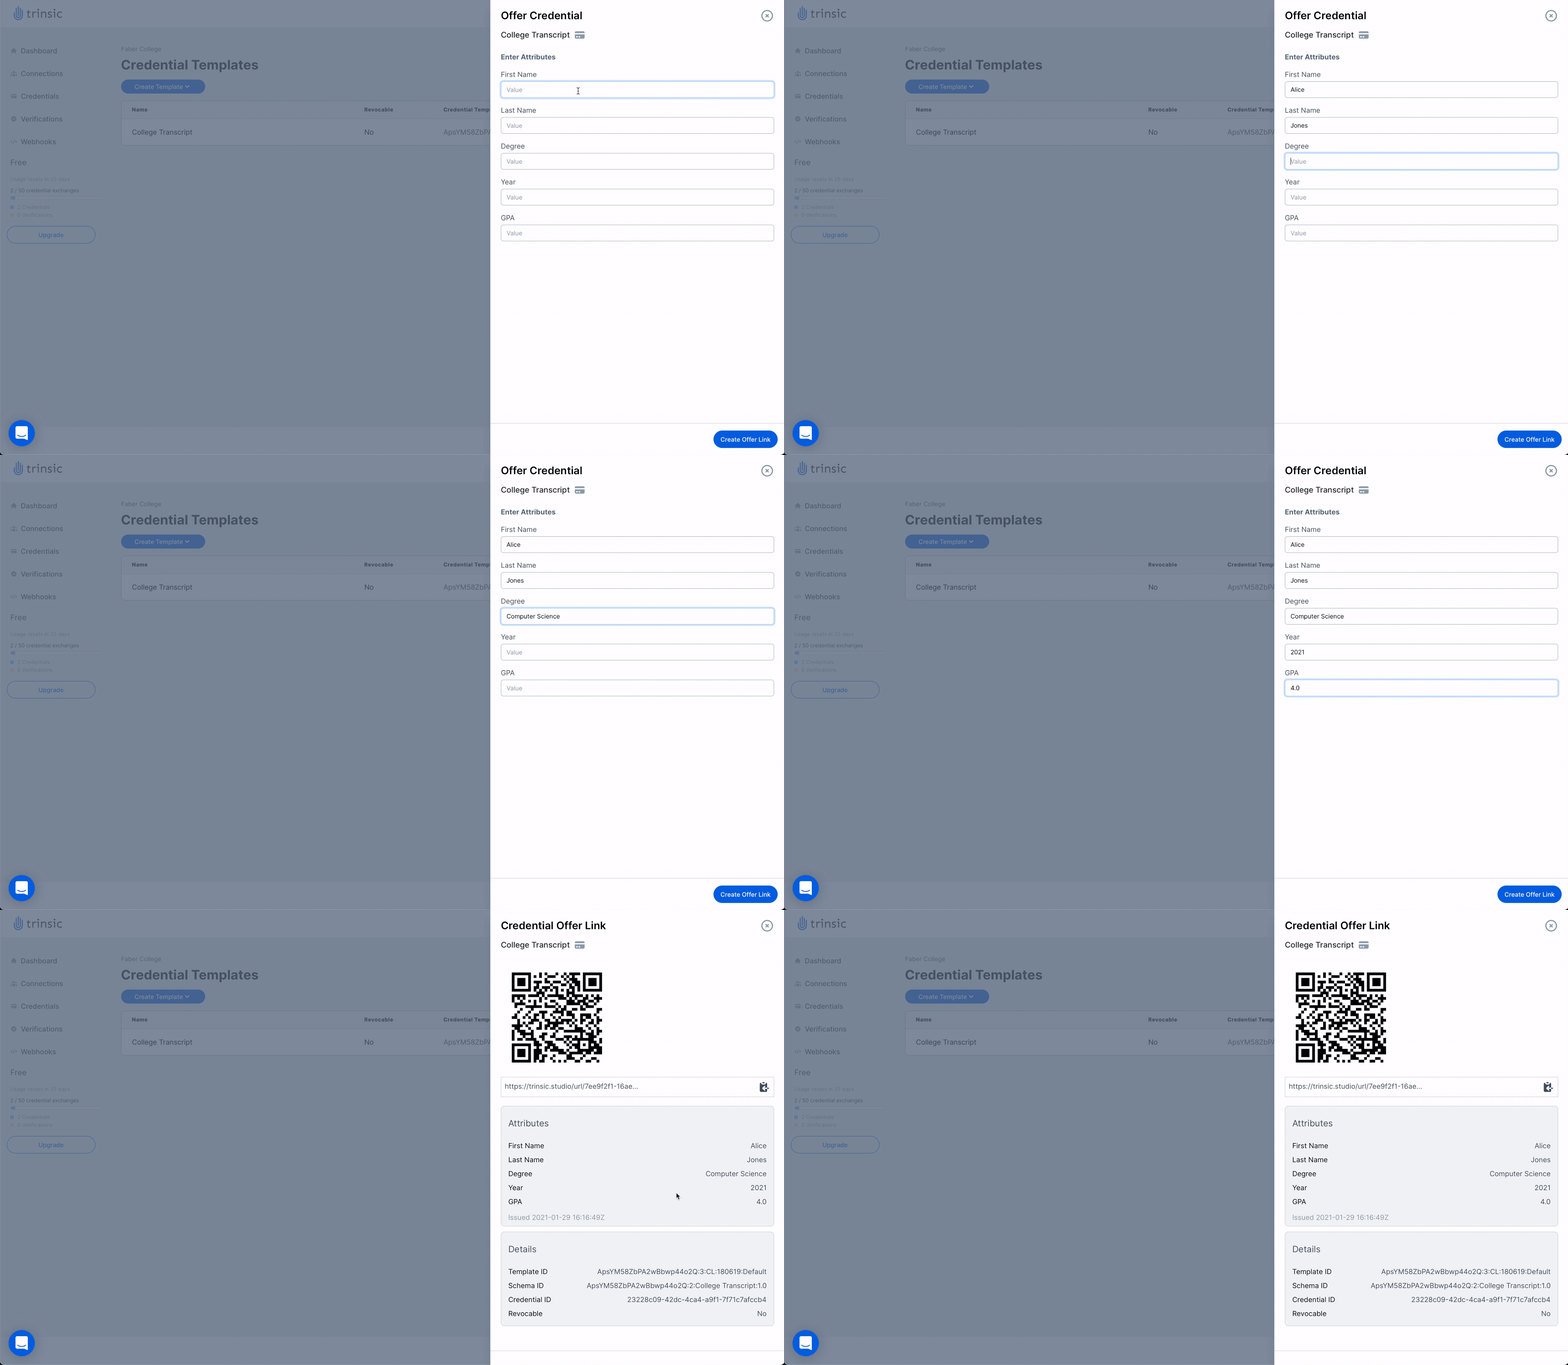
- Fill in all the attributes with Alice’s information.
- Now you must decide how you want to send the credential. It can be by connection (which we will cover soon in an upcoming blog post), by email, or by QR code/link. We will choose to send the credential via Generate QR Code/Link.
Faber College can then send Alice her unique QR code which she can easily scan with the Trinsic Wallet or another SSI wallet of her choice. Once she scans the QR code, Alice will have her digital diploma conveniently on her phone to easily and conveniently share with future employers or whoever else she chooses.

It's just that easy
But don’t take our word for it! If you haven’t already done so, sign up for a free Trinsic Studio account today. For more in-depth tutorials and guides on getting started with Trinsic Studio, check out Trinsic’s documentation site.


